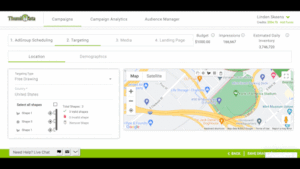
Geofencing is a powerful tool, but its effectiveness lies in how well the virtual boundaries are defined. Follow these step-by-step guidelines to create effective geofences that maximize the impact of your advertising efforts.
Step 1: Define Your Geographical Objectives
Before diving into the technicalities, outline your campaign goals. Are you targeting a specific store, event venue, or an entire neighborhood? Understanding your geographical objectives will guide the size and placement of your geofence.
Step 2: Choose the Right Geofencing Platform
Select a reliable geofencing platform that aligns with your campaign needs. Popular platforms like Google Ads, Facebook Ads are not typically as precise as a specialized geofencing service like Thumbvista that offers user-friendly interfaces for setting up geofences.
Step 3: Determine Geofence Size
Micro-Geofences (20-100 meters): Ideal for hyper-local targeting, such as a specific store or booth at an event. Event case study
Standard Geofences (500 meters – 1 kilometer): Effective for targeting larger areas like shopping centers or neighborhoods.
Macro Geofences (1-5 kilometers): Suitable for city-wide campaigns or large-scale events.
Step 4: Pinpoint Geofence Placement
Precision is key. Use mapping tools provided by the geofencing platform to pinpoint the exact locations you want to target. Ensure the boundaries are strategically placed to capture the desired audience without extending too far beyond.

Step 5: Set Parameters and Notifications
Define the conditions that trigger your geofencing campaign. Whether it’s when a user enters, exits, or lingers within the geofence, tailor your parameters to align with your campaign objectives. Additionally, set up notifications for real-time insights and adjustments.
Step 6: Craft Compelling Messages
Tailor your ad content to resonate with the localized audience within your geofence. Consider local language nuances, cultural references, and current events to enhance message relevance.

Step 7: Test and Optimize
Before launching your campaign, run tests to ensure the accuracy and effectiveness of your geofence. Monitor performance metrics and be ready to optimize based on real-time data, adjusting parameters or ad content as needed.
Step 8: Monitor Privacy and Compliance
Ensure your geofencing practices align with privacy regulations. Clearly communicate data usage and provide opt-out options for users within your geofenced areas.
Step 9: Launch and Evaluate
With everything in place, launch your geofencing campaign. Monitor its performance closely and gather data for evaluation. Regularly assess key performance indicators (KPIs) and make data-driven adjustments to maximize your campaign’s impact.
Step 10: Iterate and Expand
Based on your campaign results, refine your geofencing strategy for future initiatives. Consider expanding to new locations or tweaking parameters to optimize performance continually.
Key Takeaway:
Creating effective geofences involves a strategic blend of planning, precision, and ongoing optimization. By following these step-by-step guidelines, businesses can harness the full potential of geofencing, ensuring that their campaigns reach the right audience at the right place and time.

